Are you running a business where your employees need to travel frequently?
Want to create an online travel request form on your Joomla site? So you can make the request for reimbursement from your employees.
If yes, I am going to cover the step by step guide where you will learn how you can create an online travel request form on your Joomla website and send those requests directly to your HR or admins.
What it is and why do you need an online travel request form?
A travel request form is a form where your employee submits all of his travel details so you can approve and issue the reimbursement to him.
You can gather all the information from your employee which you need to record and send it to higher authorities so they can approve their trip.
Suppose you have hundreds of sales people who often need to travel outside the country or within the country for different purposes. If they are informing you through email, it would not be in an organized way. But if you ask them to submit their details through a form, you can organize all the details and check whenever you need them.
You can even connect your forms with CRMs or excel sheets using Zapier as well.
So to create an online travel request form, you need to be sure that what information you want to collect from the traveler. These details can be:
- Traveler name
- Email ID
- Employee Code
- Manager Name
- Reason for travel
- Departure date
- Arrival Date
- Types of arrangement need (Flight/Rental Car/Both)
- Any additional information
So to create a form with all these details you will need a form builder that gives you full flexibility of adding and removing the fields and arranging them, storing the data, sending the notifications to the respective persons.
There are many form builders available in the market, but we will use the Convert Forms extension which comes with free and paid for both of the versions.
So if you don’t have Convert Forms installed on your Joomla website, install it now, and let’s start to create a travel request form.
How to Make An Online Travel Request Form on Joomla Site?
Now, I am assuming that you have installed the Convert Forms on your Joomla website successfully. So now we will move to create the travel request form.
Creating a Joomla Form
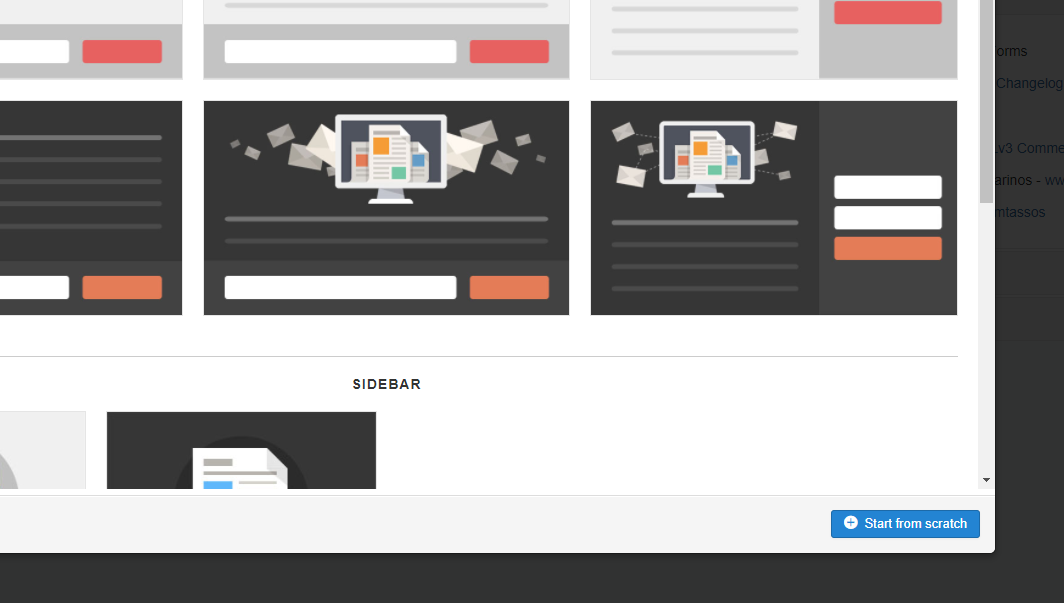
You can either choose the ready-made templates or you can start from scratch. In the tutorial, I am starting from scratch. So follow the steps.
Navigate to Components > Convert Forms > Dashboard. Now, once you are on the dashboard, click on the New button in order to create a form. As soon as you will click on the New, you will see a popup. Click on the Start from Scratch.
Now, you will see a dummy form with two fields and one button. Now, we have to add the required form field which we have mentioned above.
So here are the types of fields you need to add in order to create your form.
| Label | Field Types |
|---|
| Traveler Name |
Text box |
| Email ID |
Email Address |
| Employee Code |
Text Box |
| Manager Name |
Text Box |
| Reason for Travel |
Text Box |
| Departure Date |
Date/Time |
| Arrival Date |
Date/Time |
| Types of Arrangements |
Checkboxes |
| Any Additional Information |
Text Area |
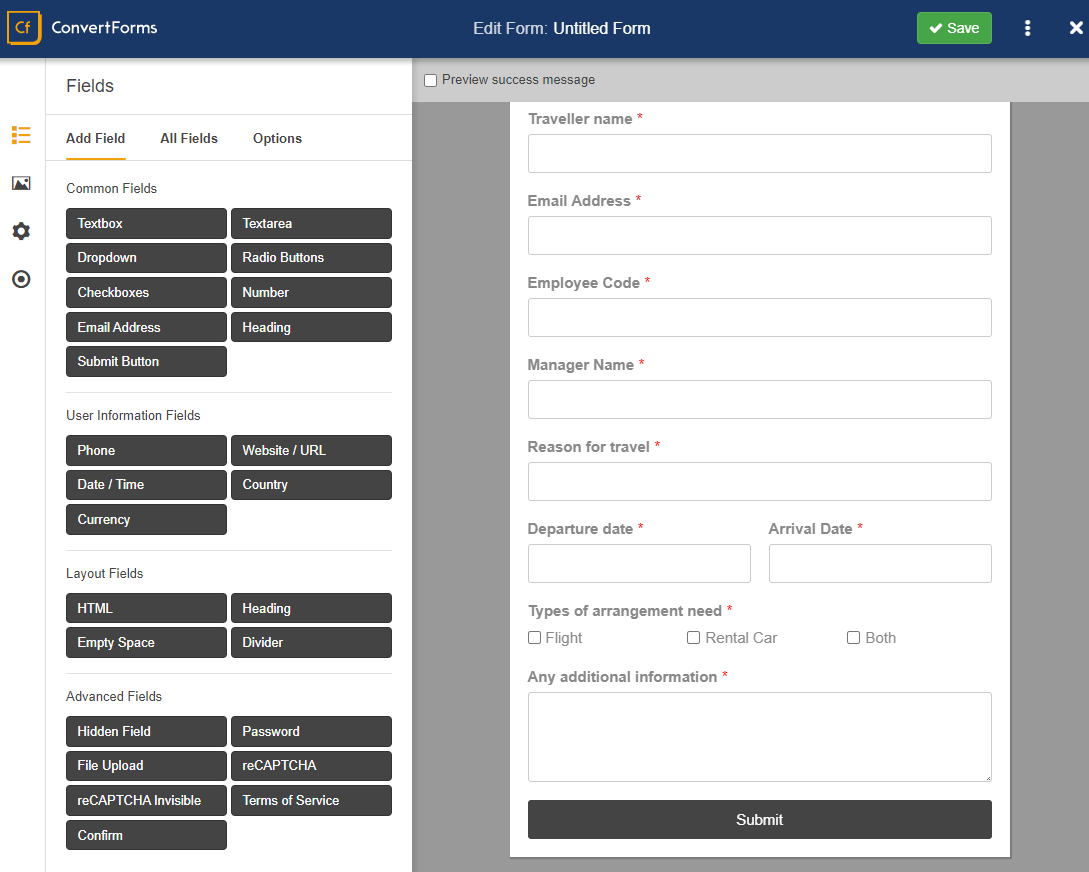
Once you are done with creating the form, just hit the Save button. Now, we will move to the next step and will configure it.
Configure Your Travel Request Form Email Notifications
If you enable the email notification, you are eliminating the chances of missing any submission or delaying in the response as they are directly delivered to your inbox.
So now, in this step, we will learn how to set up the email notifications for your Joomla forms.
On the left side of the Form editor, you will see the Setting icon. Click on it.
Now find the Email Notification and click on it. Enable it.
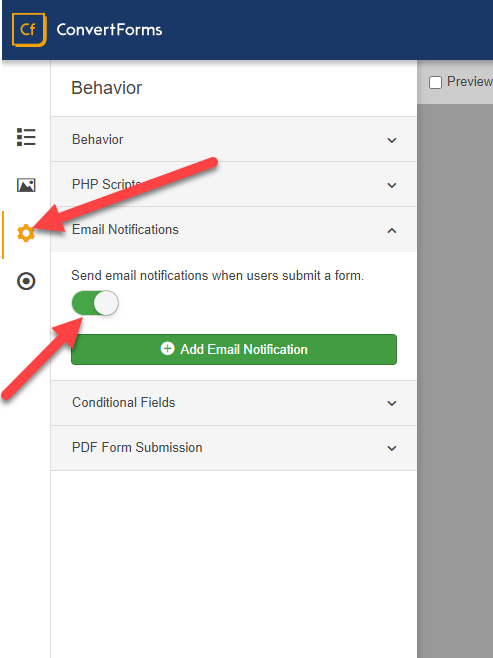
Now, you will have a button called Add Email Notification. You can add as many email notifications as you want. You can also use the Smart Tags as well in order to capture the additional data or send a copy of the submission to the submitter.
Now, click on the Add Email Notification and a form will be displayed. In this form, you can use the Smart Tags as well as use direct values as well. Here you can add the emails of HR or admin teams or anyone whom you want to send the notification when someone submits their form.
Configure Your Form Confirmations
In the last step, you have configured the email notification. Now, we will see how to configure the form confirmation. In short, we will configure what message we will have to show on successful submission of the form.
Now, you will see an icon at last with a tooltip named Submissions. Click on it. Here you will see a few options.
Collect Submissions Using the Campaign - Convert Forms allow you to create campaigns. If you have created any campaign specific for this form, you can select it from the dropdown.
Successful Submission Action: Here you can decide whether you have to display a message on the successful submission or have to redirect the user to any other web page.
If you will choose the Display message, you will see a message box where you can type a message which will be displayed after form submission. And if you choose the Redirect user, it will ask you to enter the URL where you want to redirect your users.
Publish Your Form to Your Website
We are almost done. The final step is to publish this form on a web page. So you can share that page with the employees and they can fill this form.
The Conver Forms offers you three ways of publishing a form.
- Publish through Module
- Embed the form
- Publish using Menu Item
We will try both of the methods.
Publish Form Through Module
Navigate to Extensions > Modules. Now click on New to create a new module. As soon as you click on the New, you will be redirected to a list of modules. Find the Convert Forms module.

Now, click on it and you will be on the new page. Name the module here and select the form you want to publish.
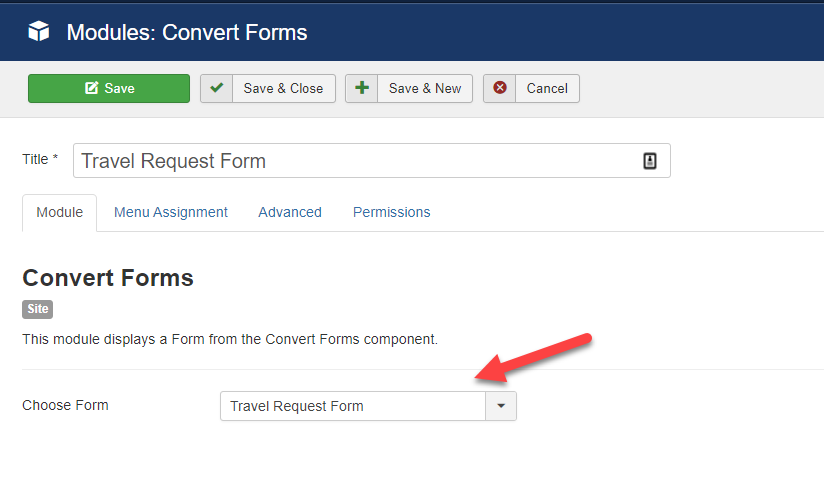
From the Menu assignment, you can select the menu item where you want to publish this module. And don't forget to choose the desired module position from the right sidebar. Once all done. Click on the Save button and voila you have successfully created the form and published it on your website.
Embed the Form
You can load the form in content articles or in the module using the Shortcode as well. You can find the shortcode either on the form listing page or on the Form editing page.
So to get the Embed shortcode, click on the Form you want to embed. You will be on the form editing screen. On the left side of the screen, you will see Three Dots alongside the Save button. Click on it. Find Embed and click on it.

Copy the shortcode from the popup and add anywhere in the content articles or module wherever you want to publish.
Publish Via Menu Type
The other way to publish the form is the Menu type. To create a menu item to display a Convert Form go to your menu > press "New" > Locate "Convert Forms" and then select "Form".

Then go to Options > "Select Form" and select the form you wish to display on the front-end of your site.
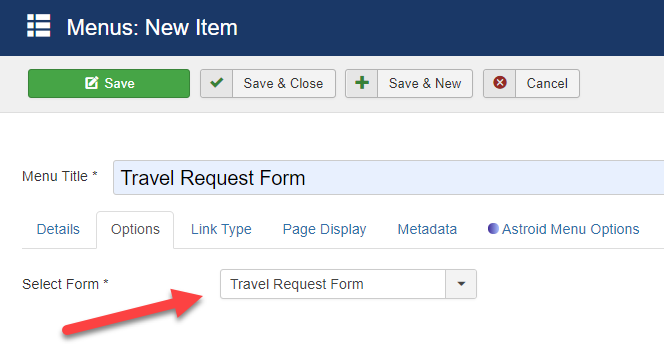
Finally, Save the menu item and on your site, you can navigate to the menu item you created which should display the form you have selected.
So this is how you can create a travel request form on your Joomla website and organize the data in a better way.
Feel free to comment below if you have any questions or ideas to improve this article.