In this tutorial we are going to see how to setup Joomla to use a Proxy server to communicate with the rest of the network when it can't do it natively.
What is a Proxy Server?
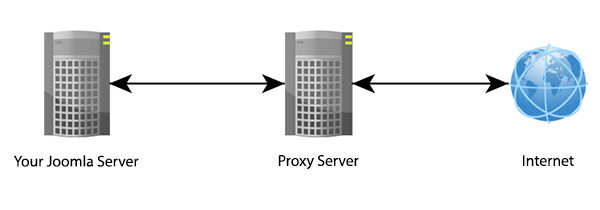
A Proxy Server is a means to mediate communication between your server and the rest of the network. In most cases where it's needed it is part of the immediate network where your Joomla CMS is installed. When your Joomla wants anything from the Internet or the network outside of the one it lives in, it can use the Proxy Server as a gateway.
Why do I need a Proxy Server?
In some occasions Joomla may have been installed to a server which resides in a restricted environment. This can mean that the server can not directly communicate with certain servers on the Internet or even with any of them.

For these occasions it is needed that you use a Proxy Server to do the communication on Joomla's behalf.
How do I enable my Joomla site to use a Proxy Server?
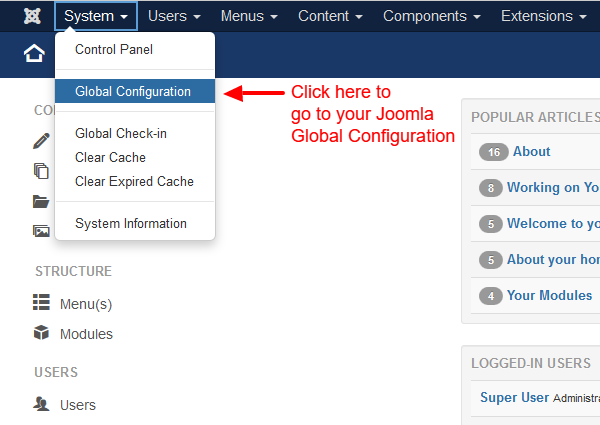
First, login to your administration panel and navigate to System > Global Configuration

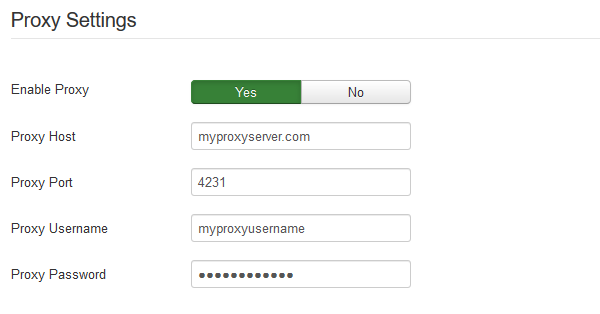
Then click the Server Tab and scroll down until you find the Proxy Settings. Once you find them, click Yes to enable Proxy.

The rest of the proxy settings will be revealed once you enable it. Let's see what is there to fill out
- Proxy Host: This is the host of your Proxy Server. It can be a simple domain name or even an IP.
- Proxy Port: A Proxy Server uses a specific port to communicate with the servers that use it.
- Proxy Username/Password: The credentials you should fill out to use the Proxy Server.
If you are unsure about any of the above settings you should ask your network administrator.
That was all there is about Joomla and Proxy Servers. Feel free to sign up to our Newsletter and follow us on Twitter to stay updated about our latest tutorials for Joomla!