In this tutorial we are going to see how to enable reCAPTCHA for your Joomla website. Briefly, reCAPTCHA is a free service from Google that helps protect websites from spam and abuse. A “CAPTCHA” is a test to distinguish between humans and bots. Humans can solve it quite easily, but “bots” and other malicious software have a hard time figuring it out.
Lets see how to enable and use reCAPTCHA in Joomla.
Enable reCAPTCHA Joomla Plugin
On fresh installs of Joomla, the reCAPTCHA plugin is by default disabled. So in order to use it we must enable it first.
To do that, login to your administrator panel and navigate to Extensions > Plugins
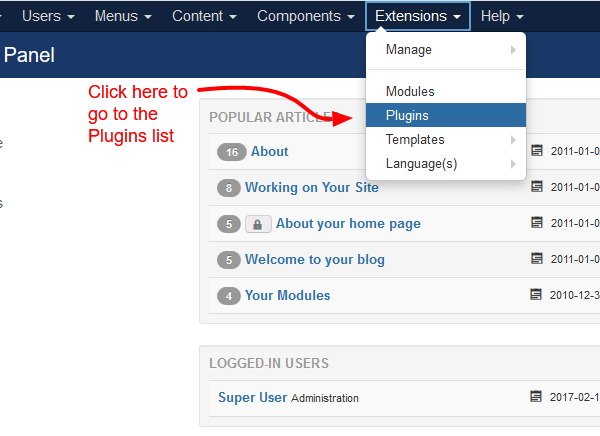
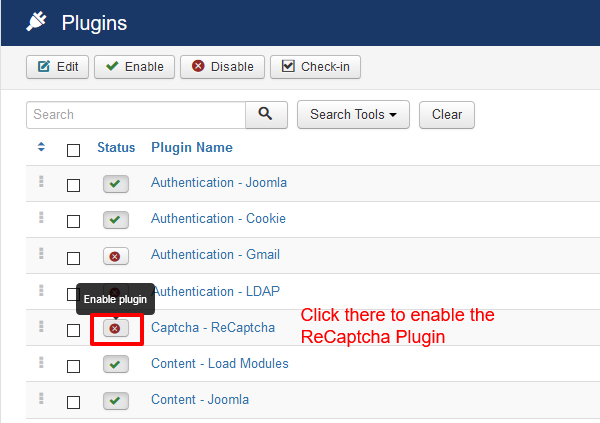
Next, you’ll have to find the plugin in the Plugins list. On a fresh install it should be in the first page ready for you to enable it. Otherwise, just use the search bar with the keyword “recaptcha” and you should be able to find it easily.
To enable it just click on its publish button next to its name like in the screenshot below.
Then we need to configure the plugin to communicate with Google’s reCAPTCHA Service.
To do that, first we need to go to Google reCAPTCHA in order to obtain a Site Key and a Secret Key. These keys are necessary for Joomla so that it can communicate with Google.
To get these keys you need to have a Google Account and then you need to add your website’s domain name into Google’s reCAPTCHA page. This way you’ll end up in a screen like the one below from which you can copy the two keys we already talked about.
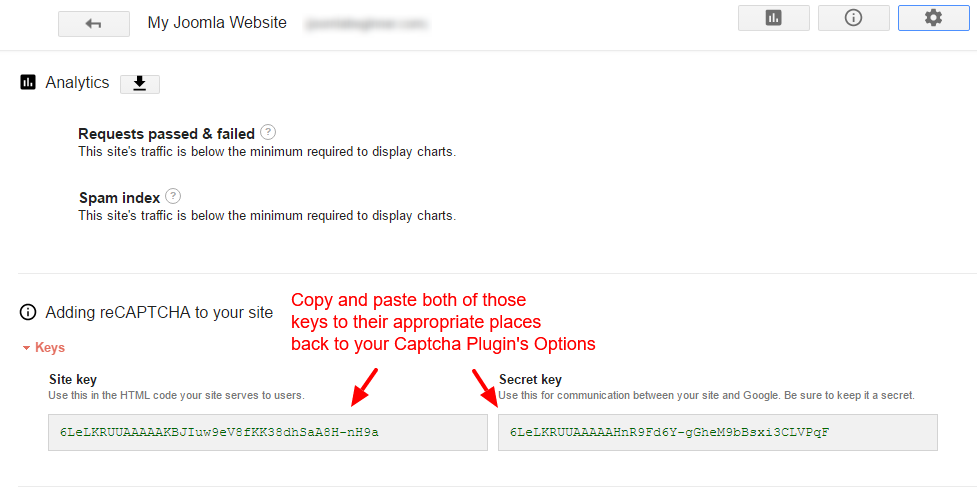
Now that we have the keys we need to paste them into our Joomla reCAPTCHA Plugin.
To do that, click on its name in the previous screen and paste the keys in their appropriate places like in the screenshot below.
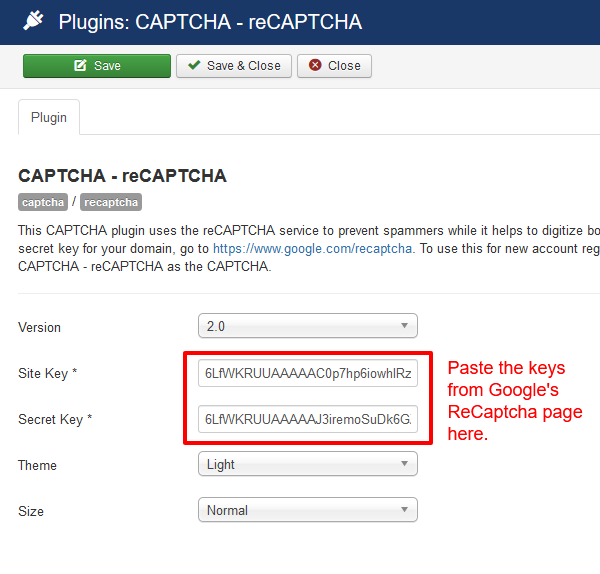
Finally click Save and you are done enabling the Joomla reCAPTCHA Plugin. All that is left now is to configure Joomla to use it. Let’s see how.
Enable reCAPTCHA protection in Joomla Registration Form
To configure Joomla to use its reCAPTCHA plugin we need to navigate to System > Global Configuration.
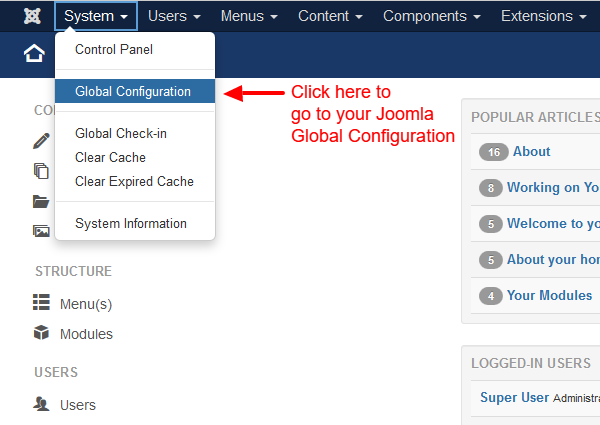
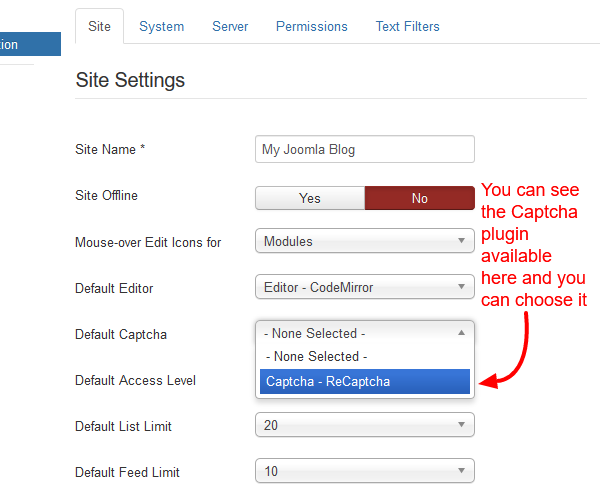
Once you are there you will be able to see the Default Captcha option almost at the middle of your screen in the Site Tab which should already be active. This option should now have the reCAPTCHA plugin available for you to choose.
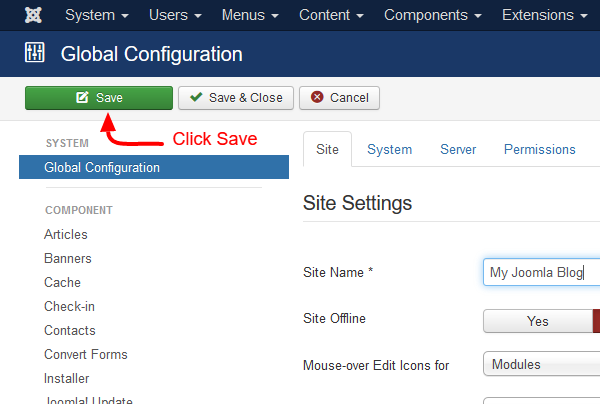
Finally click the green Save button at the top of your screen and you are done!
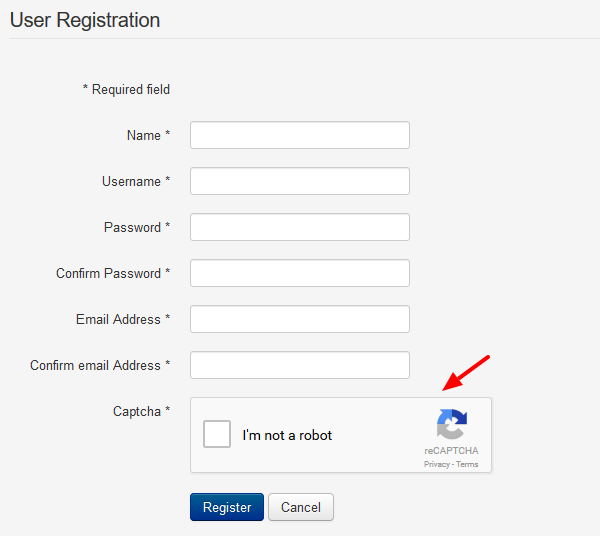
Now your reCAPTCHA is enabled and you Joomla registration form should look like this one below.
We hope you liked our guide about Joomla’s reCAPTCHA capabilities! If you’d like to keep updated with our latest guides feel free to sign up to our newsletter and follow us on Twitter!