Are you a fan of Custom Fields in Joomla? Have you ever used those? Today in this article, we will discuss how you can level up your Joomla registration form with custom fields. Custom fields are firstly introduced in 2017 with the release of Joomla 3.7.
But still they are in limited, and you can’t do much with inbuilt custom fields. So either you have to create your field type which is hard for a non-coder like me.
Or you can use any third party Custom field Joomla extension which solves your purpose.
For today's tutorial, I will need a File Upload Field type, and it is not available in inbuilt Joomla custom fields. So I have to use any third-party Joomla extensions.
Introducing Advanced Custom Fields

Introducing you the Advanced Custom Fields. It helps you to extend your Joomla website with advanced types of custom fields such as YouTube, Vimeo, Dailymotion, Google Map, Bing map, Download button, Progress bar, Custom PHP, QR code, Currency, File upload, and many others.
Apart from the wide range of custom fields, it also offers you the publishing assignment feature which allows you to conditionally display any custom field based on page's URL, DateTime, User Groups, Domain referrer and much more
Advanced Custom Fields comes with free and pro version so if you don’t want to invest initially, you can try its free version and later you can upgrade to pro. Most of the custom fields are available in the free version but Sorry, if you need File Upload Field Type, you have to get the pro version as it is not available in the free version.
How to add File Upload Field to the Joomla Registration Form
There are many cases when you need to enhance your Joomla registration form, but due to the limitation, you can’t. In our case, we want to add a field where the user can upload their profile image. But Joomla by default does not offer any such feature. So I have to use the Advanced Custom Fields.
If you haven’t downloaded the extension yet, please download and install it on your Joomla website. To know how to install Joomla extensions, follow this guide.
Once installed, follow the guide.
Step 1: Create a new Custom Field
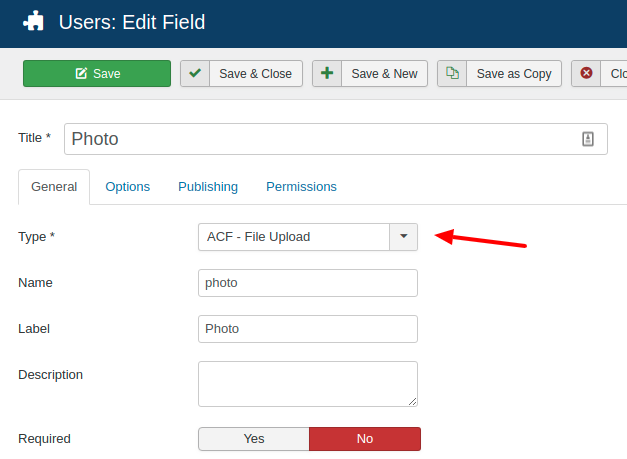
Navigate to Users > Fields. Click New to create a new custom field. Name the field and Select ACF - File Upload from the Type.

Either give a custom Name and Label to the field, or it will auto-generate from the title. Also, you can set either it is required field or not.
Step 2 Set File Upload Rules
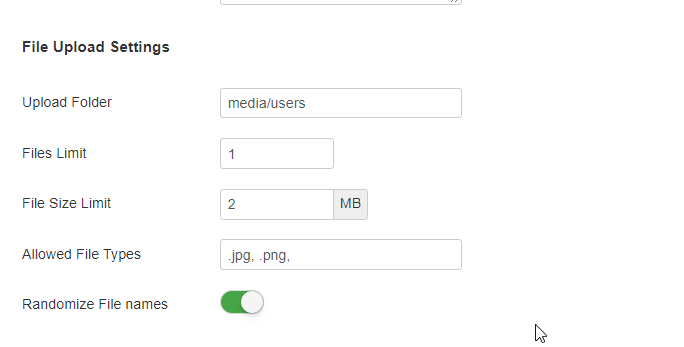
If you are creating a field to set up the user’s profile pic, you will not want the user to upload a video or gif or a large image. So in my case, I would like to allow users to upload only one .jpg or .png image and size should be up to 2 Mb.
To obtain these, find out File Upload Settings.

Here you can set where should uploaded images go and other settings. To fulfill the requirements as mentioned above, we have to do the following settings.
- Set File Limit to 1
- Set File Size Limit to 2
- Set Allowed File Types to .jpg, .png
Step 3: Set how the uploaded file will be displayed in the user profile page
Now, you have to set how you want to display the uploaded image in the user profile page. Do you want to show it as a link or as an image? In our case, we want to display the actual uploaded image when a user views their profile page.
To do so, find Front-end Display and check Layout. Select Image from there, and you are done.

At last, save the field and move on to test your registration form.
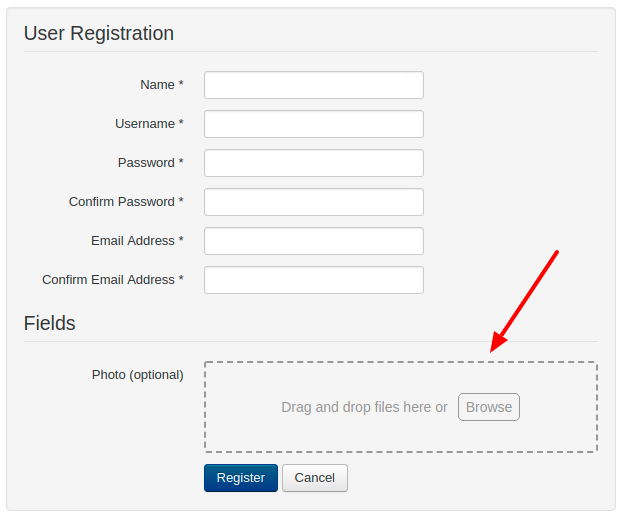
Step 4: Test the Joomla! Registration Form
Visit on your Joomla registration page. There you should see a file upload field with the name you have given in the Label.

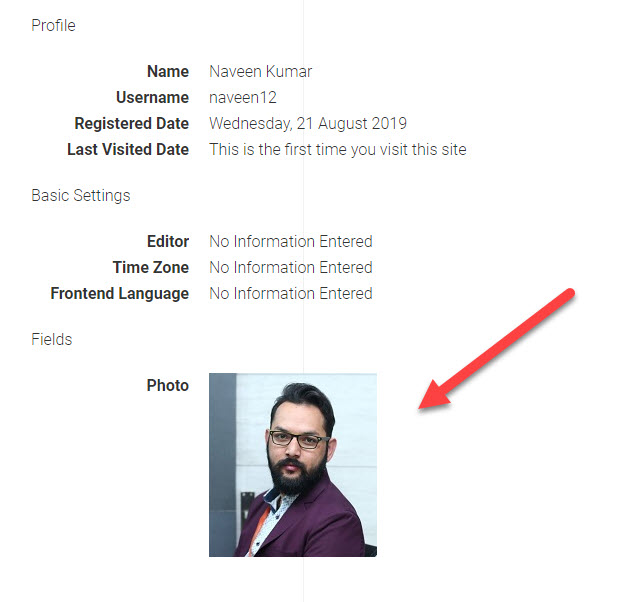
Step 5 View the Uploaded Photo in the User Profile Page
At last, you would like to test how it will look on the user profile. To do so, you need to go to the User Profile page, and there you will be able to check the overview of the profile.

And this is how you can add file upload field to the Joomla registration form and enhance your Joomla site. To more about the Advanced Custom Fields, check out the detailed documentation on the official website.